Product Photos: Correct Resolution to Prevent Blur on Retina
A practical checklist for exporting product photos at the right resolution so they stay sharp on high-density (Retina) screens.
Introduction
Retina and other high-density screens reveal weaknesses in your exports. A product image that looks acceptable on a phone can become soft or blurry on a laptop display.
This guide shows five checks to prevent blur by starting with the right source quality and exporting at the correct dimensions. Use resizer on xcropimage.io to standardize sizes and keep your product gallery sharp.
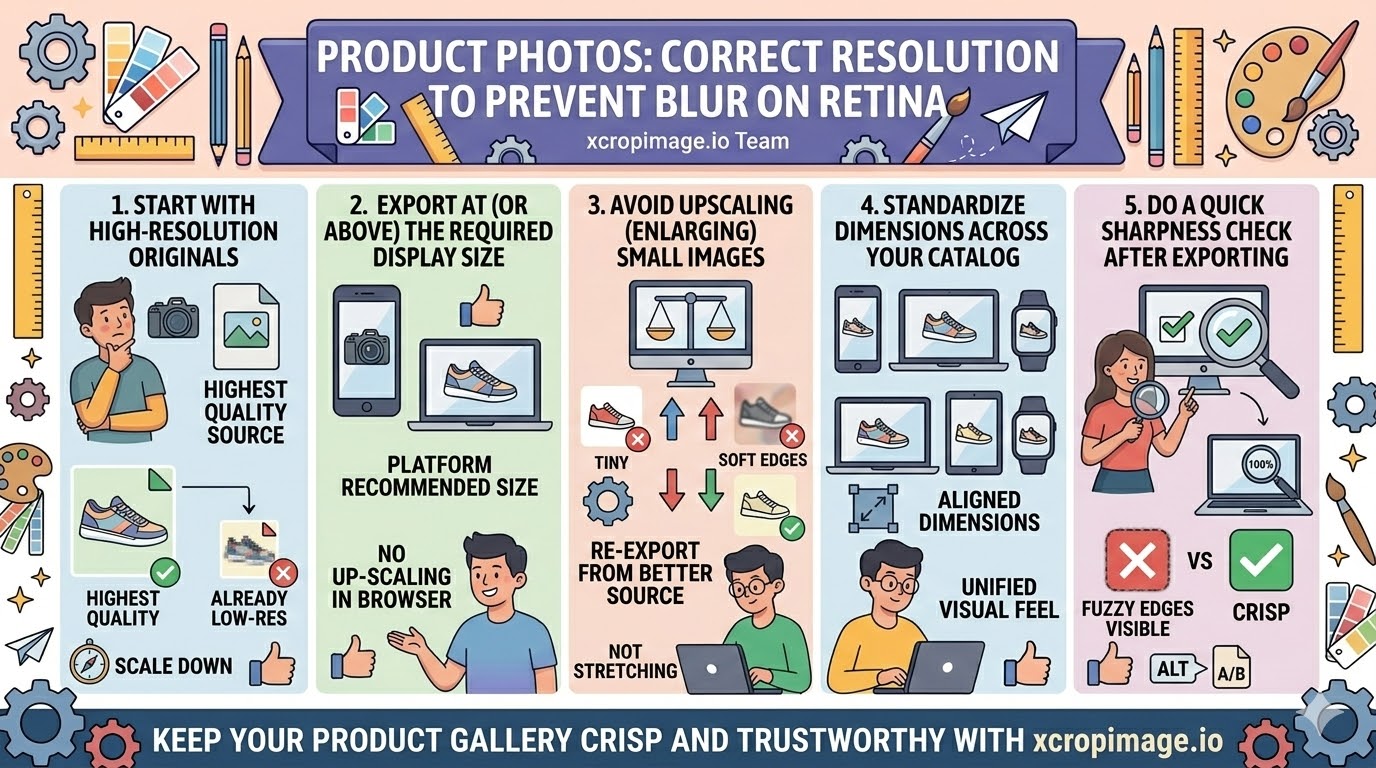
1. Start with high-resolution originals
If your source file is already low-res, no export setting can add real detail later.
Use the highest quality version you have, then scale down for specific placements.
2. Export at (or above) the required display size
A common mistake is resizing after the fact or exporting at too small dimensions.
Export at the platform’s recommended size so the image doesn’t need upscaling in the browser.
3. Avoid upscaling (enlarging) small images
Upscaling makes edges look soft and can introduce pixel-like artifacts.
If the image is too small, re-export from a better source rather than stretching.
4. Standardize dimensions across your catalog
Inconsistent exports create a “mixed quality” feeling—even if each photo individually looks fine.
Use the resizer to keep your product images aligned in dimensions.
5. Do a quick sharpness check after exporting
Zoom in at 100% on the exported file. If edges look fuzzy there, the blur will be visible on high-density screens too.
Do this check before uploading large batches.
Conclusion
Sharp product photos on Retina screens come from five checks: high-resolution sources, exporting at correct sizes, avoiding upscaling, standardizing catalog dimensions, and doing a quick sharpness check after export. Use the crop and resize tools on xcropimage.io to keep your product gallery crisp and trustworthy.